Automated Financial Tracking
Nothing Hidden In Your Financial Report.
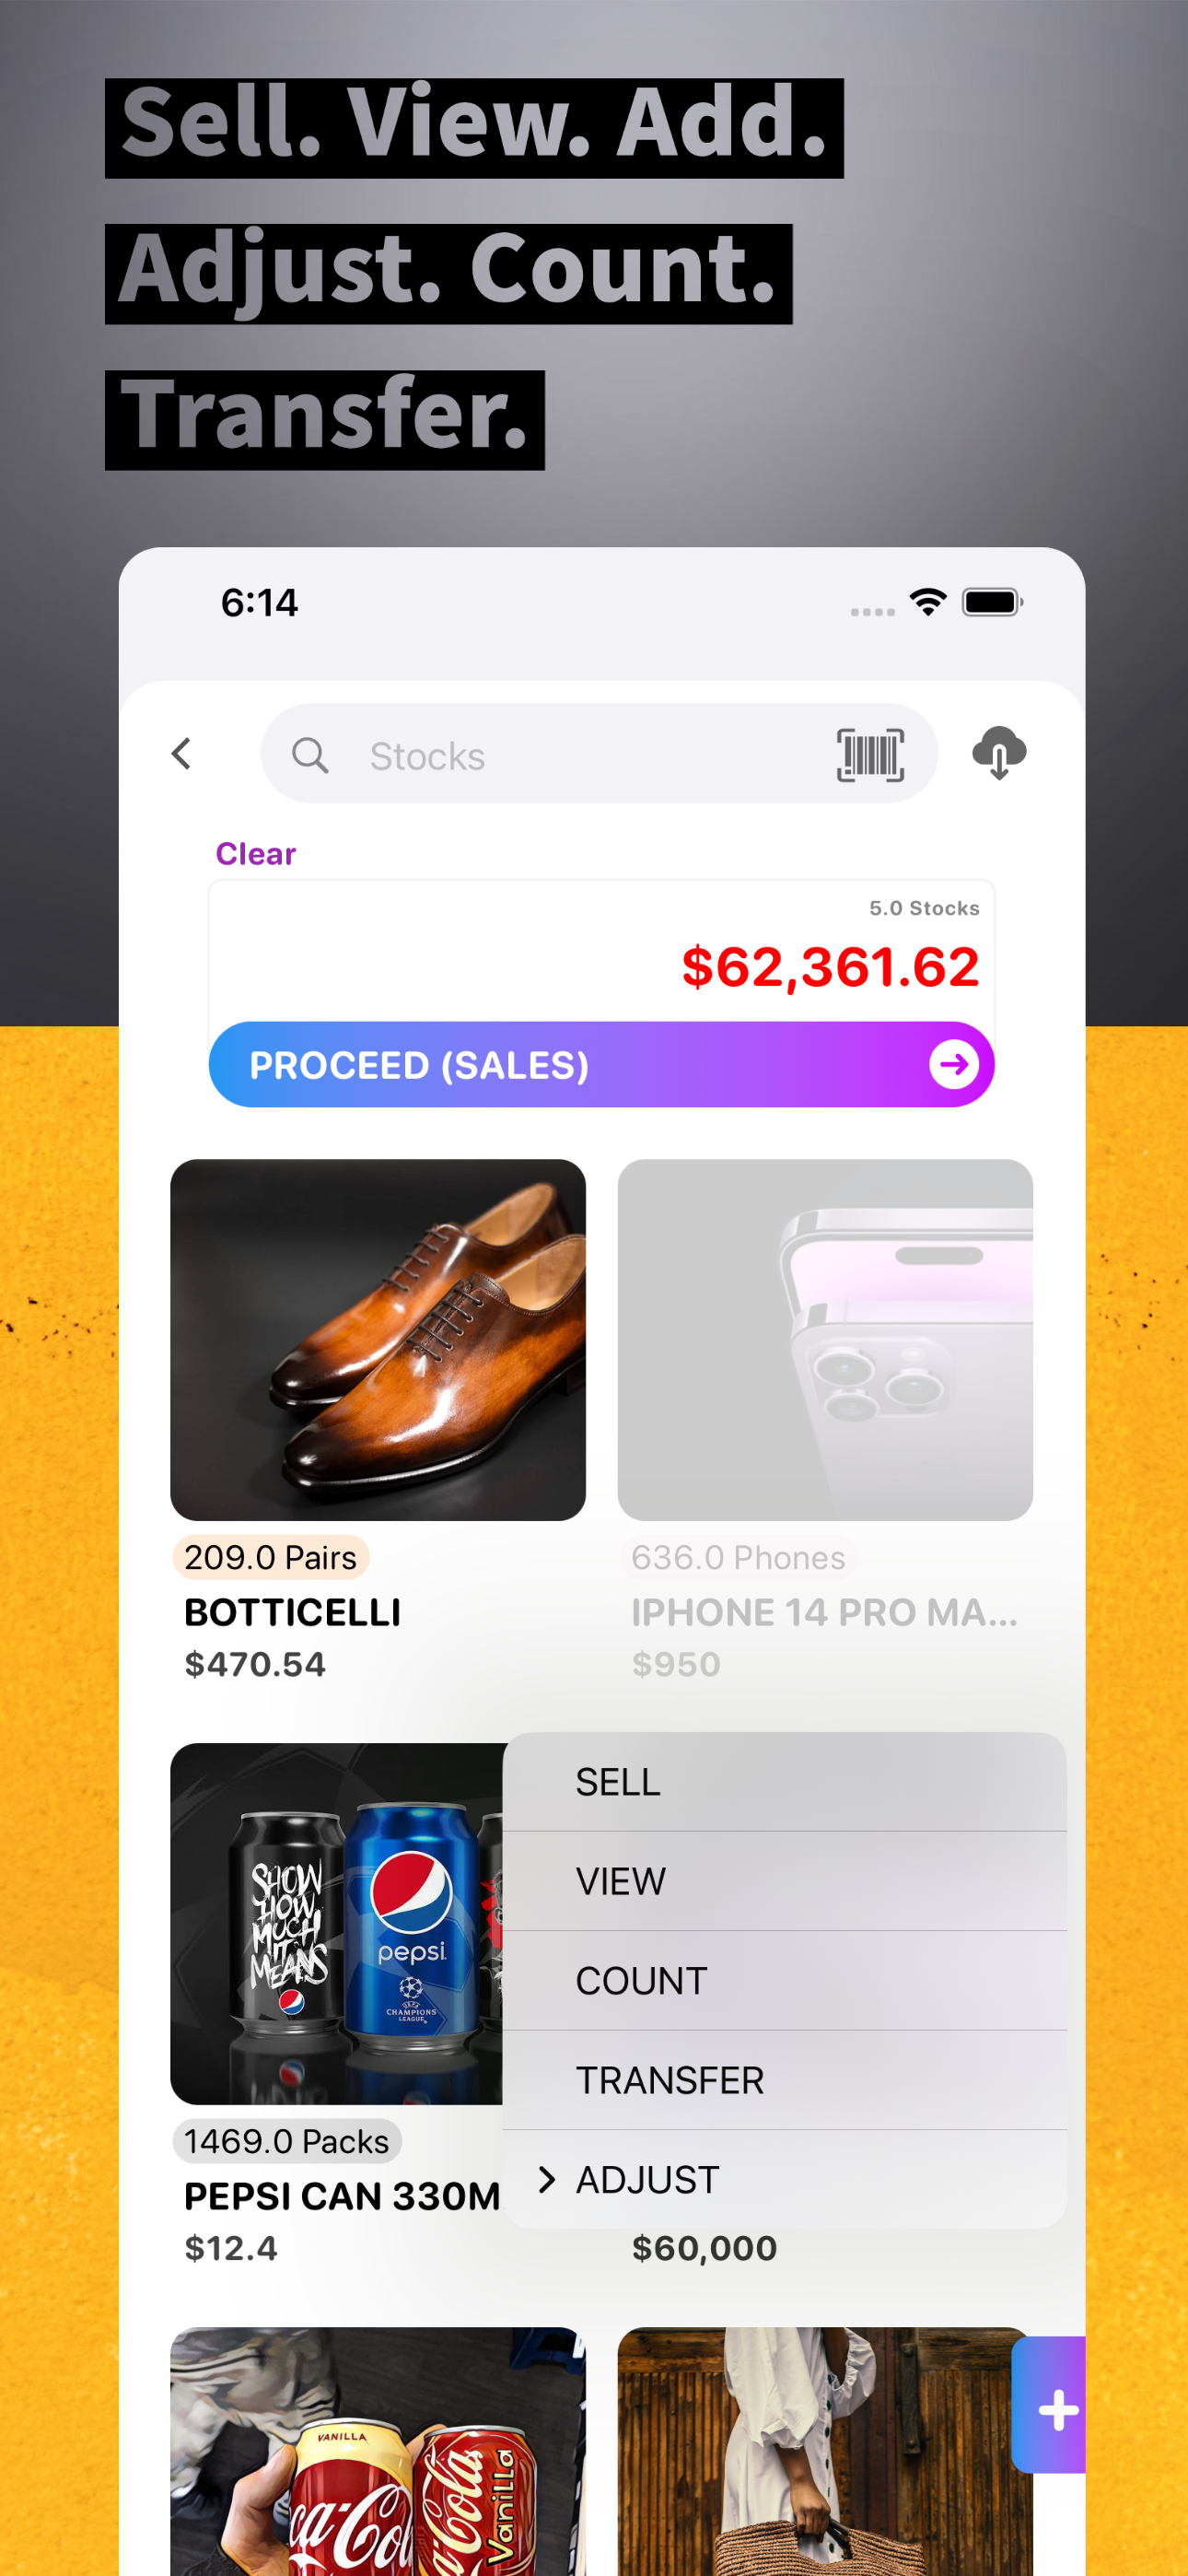
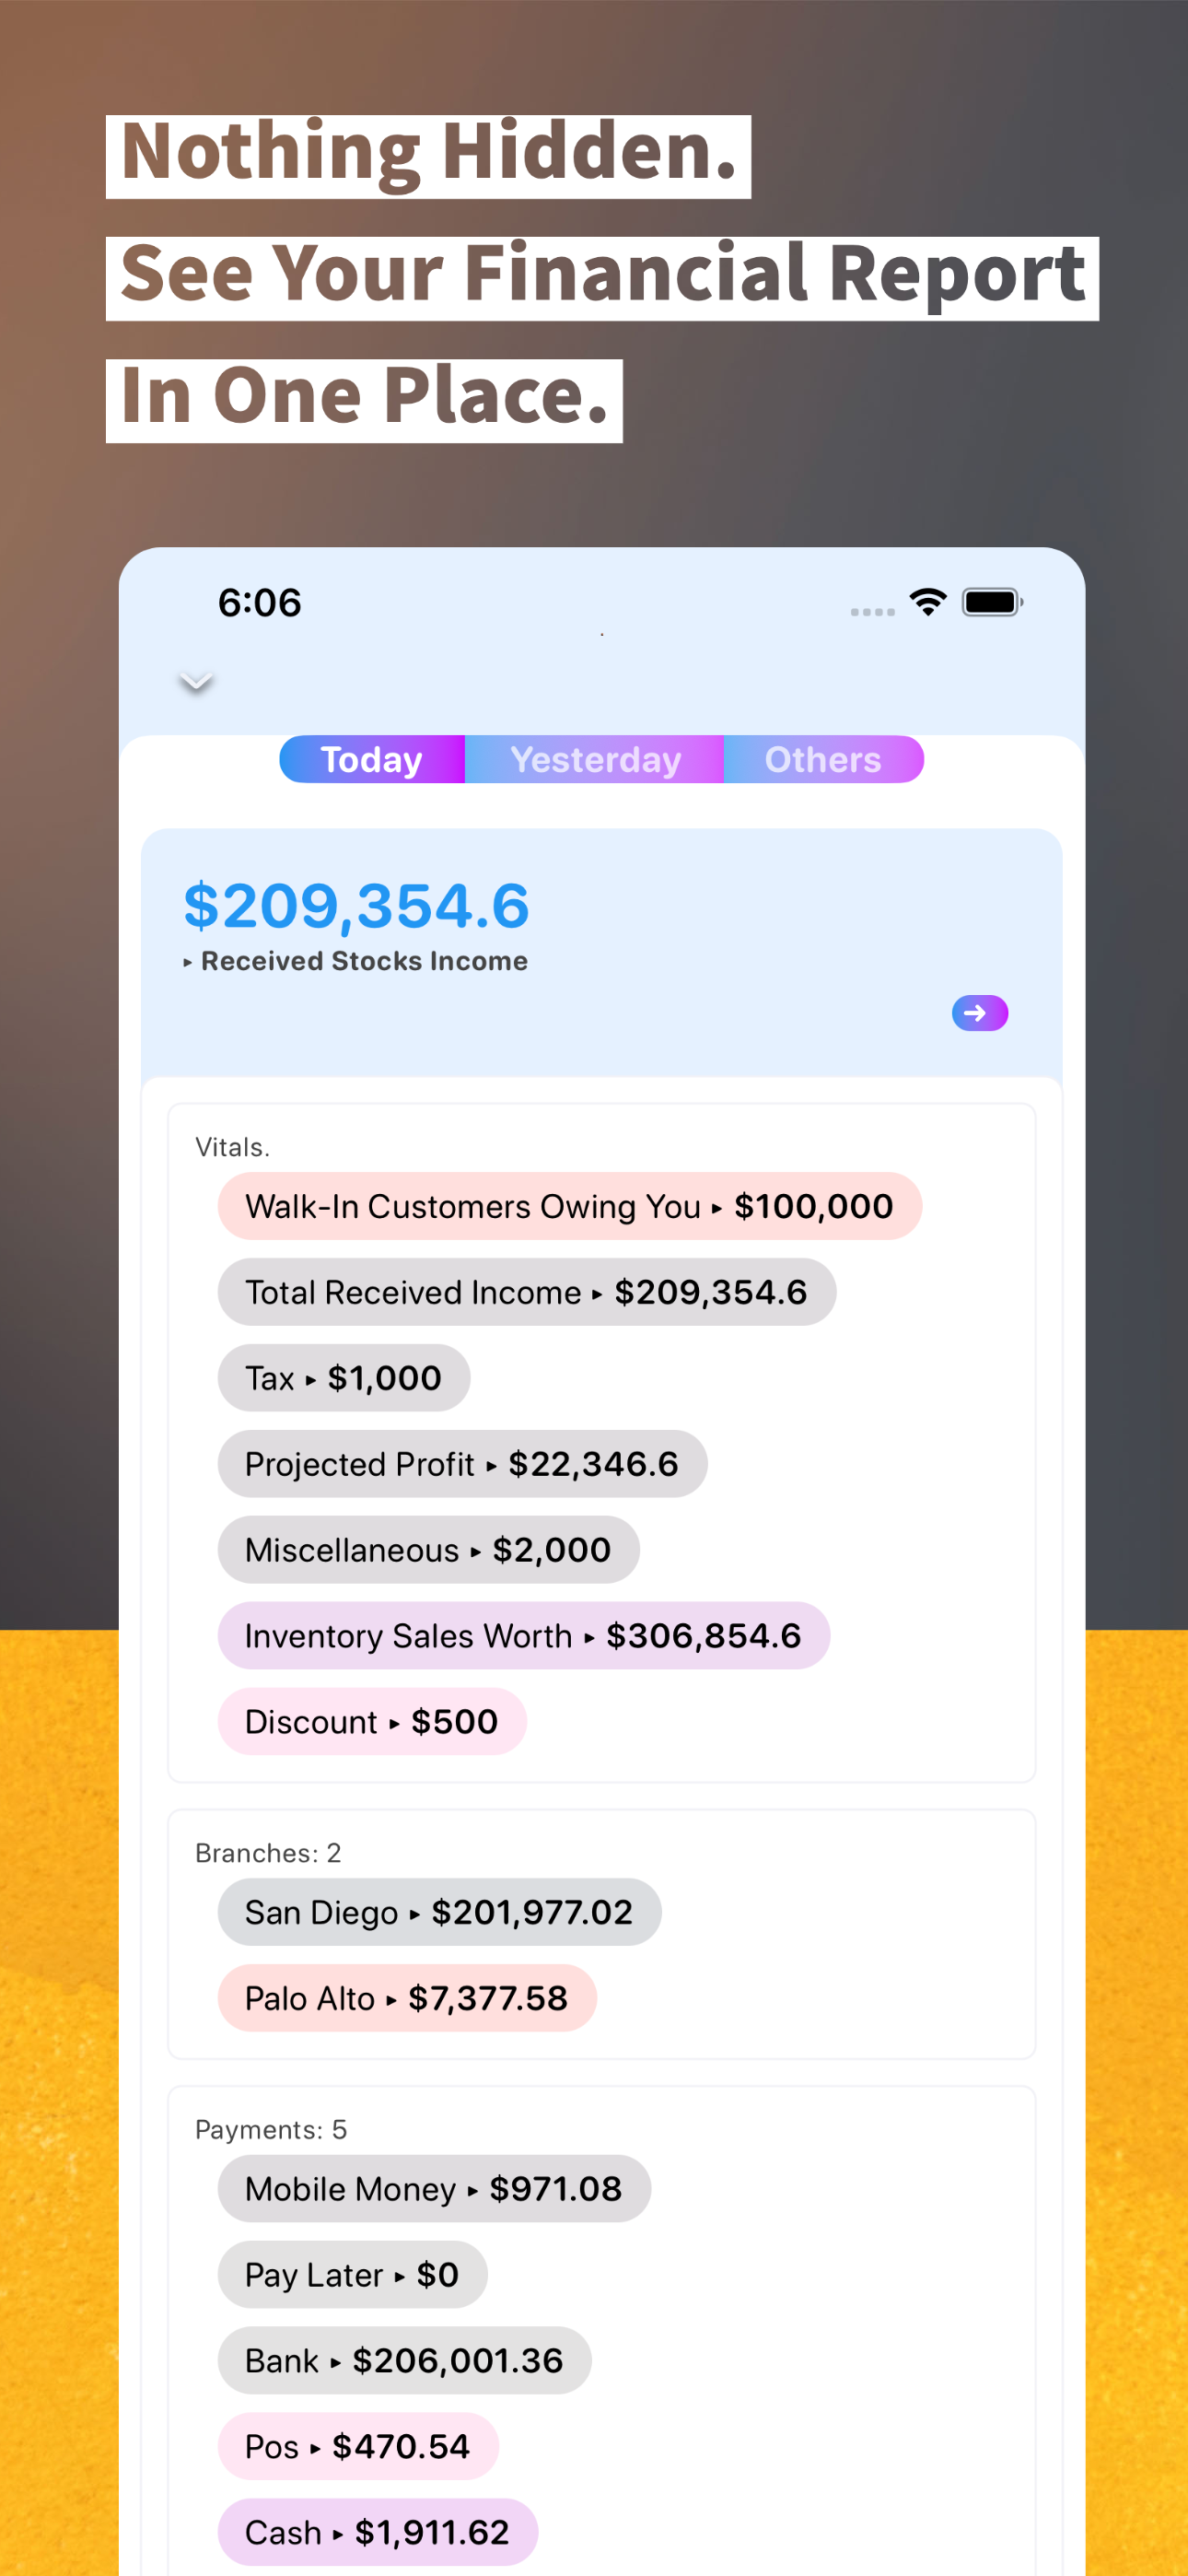
Kwayet simplifies financial tracking by centralizing all financial data in one place. [Stocks Income, Services Income, Profits, Debts, Expenses, Remittances, Etc.] With comprehensive reports and analytics, you can gain valuable insights into your financial performance, identify areas of improvement and make informed decisions swiftly.
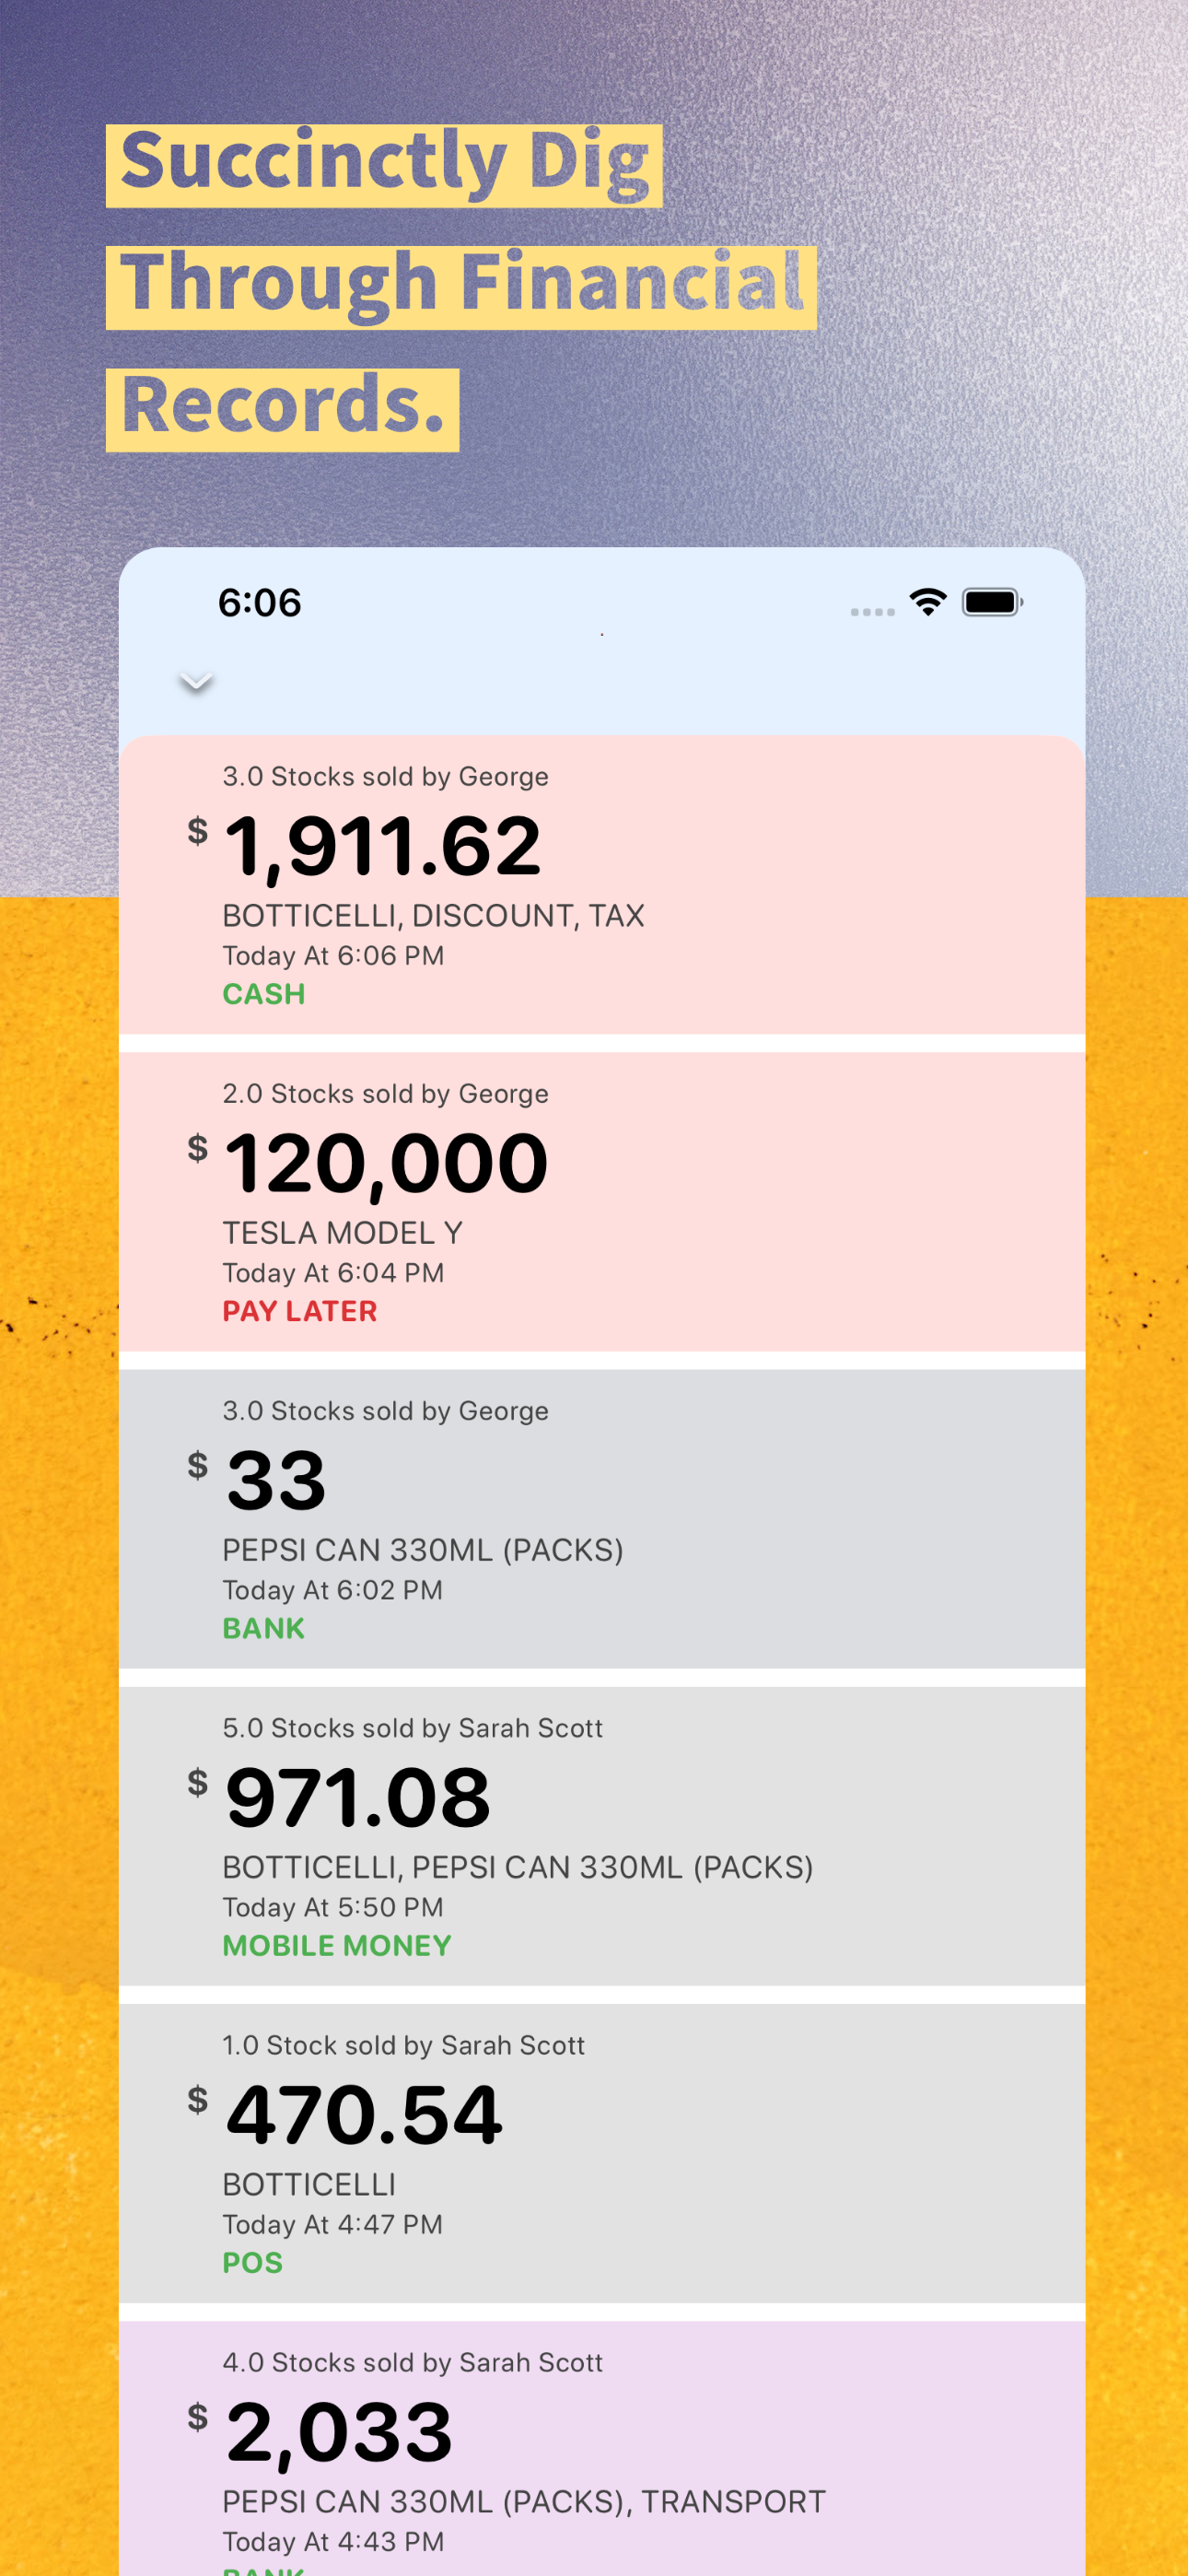
Nothing hidden in your financial report. See sales that involves discounts, pay-later, miscellanous cost and who gave the discounts, did the pay-later, added cost and to-whom etc. Tap on an amount to succinctly dig through the raw financial data that constituted that amount.
You will know your total cash, bank-transfers, POS, pay-later(debts), mobile-Money etc. by branches, people, etc.
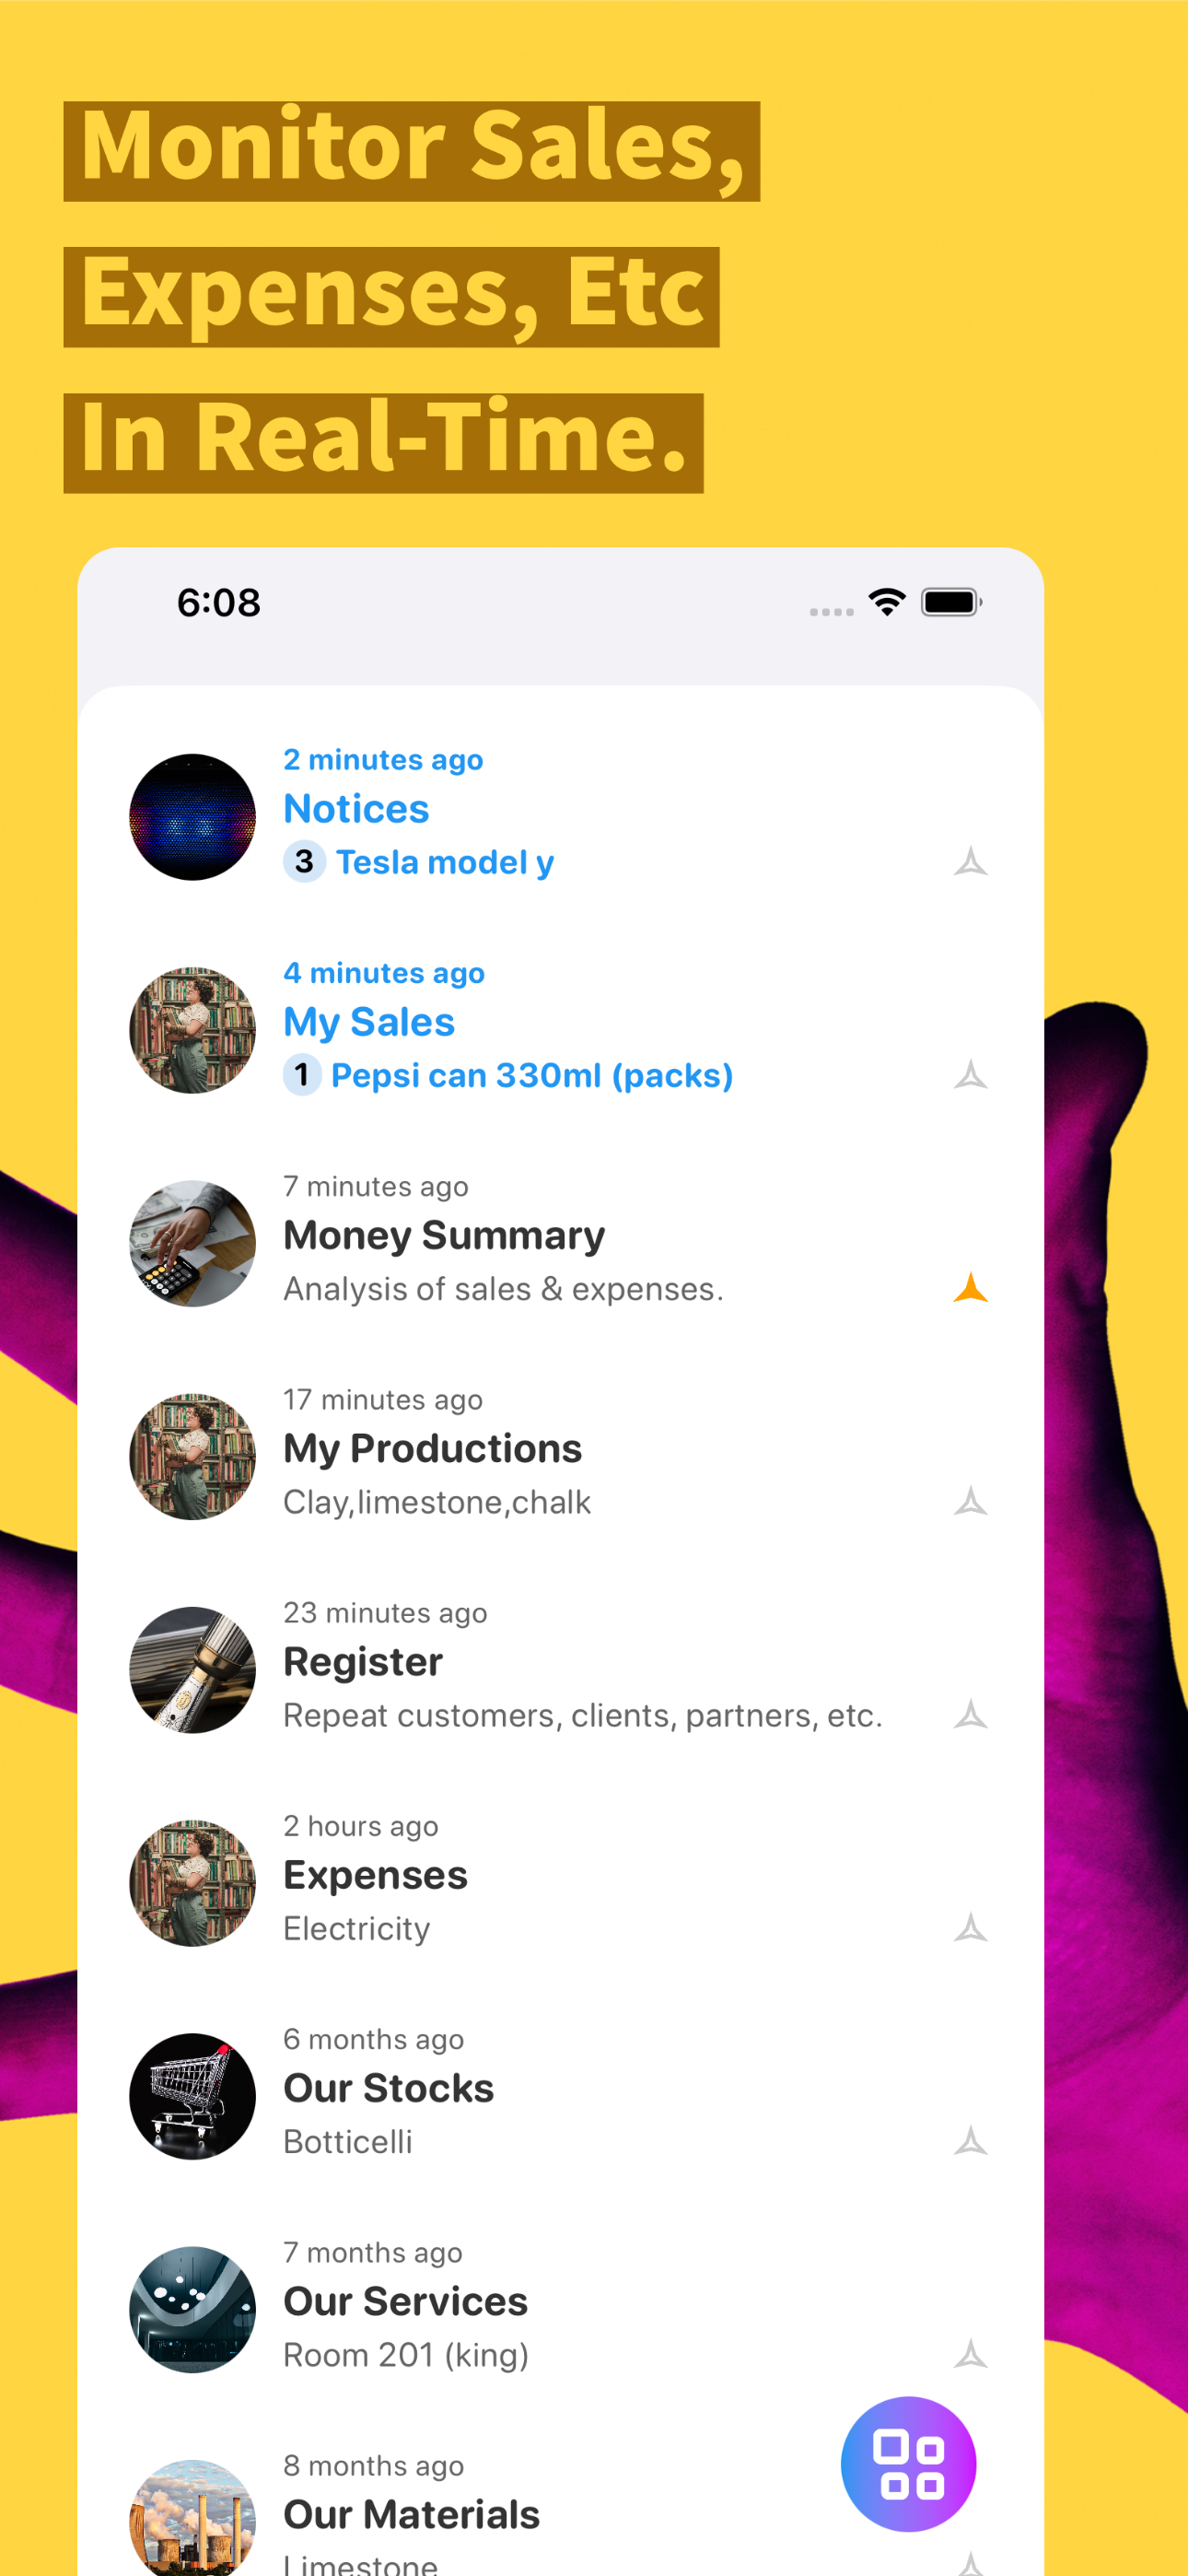
Kwayet's real-time monitoring feature keeps business owners, managers & sales-reps informed of any suspicious or important activity anytime, anywhere.